Friday, April 26, 2013

"CARbage" Bag

LOL! I was trying to say "car garbage bag" out loud, and it came out "carbage bag" which is more descriptive, anyways :-) So, "carbage bag" it is!


Adam's girlfriend, Lisa, asked me to make a couple of organizers for her SUV - she and Adam are taking a little trip to Zion National Park in Utah next month. Not knowing exactly what she wanted, I compiled a list of ten car organizer items, including over-the-seat bags, divided floor box organizers, visor clip-ons, etc. She picked a box-style organizer, and this trash bag. The tutorial is from
I used the dimensions and general instructions, although I beefed it up with Pellon 950F ShirTailor and Pellon TP971F Fusible Thermolam Plus Fusible Fleece, the fleece fused atop the ShirTailor. This makes a nice, hefty sandwich that stands up nicely.


It calls for laminate fabric inside, so it's wipe-clean. I had several half-yard cuts of laminate, and I chose one for which I had the matching quilting cotton. This is Central Park by Kate Spain for Moda. I had used a bit of it for something (?) a year or so ago, but had lots left, so I thought this was a good choice and I'll be able to make the box organizer as well, since I had a Jelly Roll, four FQs, two different laminate cuts, and some half-yard and yard cuts. Just waiting for the pattern to arrive in the mail: http://www.craftapple.com/3-the-car-organizer-pattern.html and here's a pic of the pattern, from their Website. They mailed the pattern the same day I purchased it, so it should be here soon, so I'll be posting the finished organizer soon!

CRAFT APPLE PATTERN

Wednesday, April 24, 2013

A "Girlie" Basket Request

The kids asked me to make another fabric divided basket (pattern: Noodlehead), this time in a "girlie" theme, since Baby Cummings turned out to be a girl. She looks fabulous in lavendar, so I chose Michael Miller Castles in the Sky, Once Upon A Time, Kiss Dot, Mini Cupcakes, and two matching solids from my LQS.

Since they told me I could "girlie" it up, I added a sweet little lavendar ruffle across the front pocket.
 
Ben also requested a design change, and he is right! He said "Mom, when you become a parent, you lose the use of one arm." LOL! Yep, you sure do! He showed me how it was difficult to pick up the basket (with its handles on opposite short ends) while holding little Aubrey. I said "No problem!" So I lengthened the handles by about 2 1/2" and relocated them to the long sides, angling them a bit, rather than setting them in at a right angle.
 
I love the "Once Upon A Time" lining fabric! I also beefed up the center divider panel by using the fusible interfacing and fusible fleece on BOTH sides.
 
 
I used the cupcake fabric for the exterior.
 
 
I just love these baskets! I'm sure I'll be making more in the future! Now I need to whip up some matching burp cloths and washcloths - I'll start on those today :-)


Wednesday, April 10, 2013

Aubrey Reese Cummings - Welcome to The World!

My precious new grandaughter was born yesterday to my son, Ben and his wife, Autumn! 7 pounds, 8 ounces and 20" long, with HAIR! Everyone is doing just fine, and this grandma is WAY excited to have a grandaughter! I had convinced myself it was going to be a boy so I was stunned when a girl popped out :-)

A girl! Ruffles! Pink! Cute! Oh my...am I going to have fun sewing for this little cutie pie :-)


Daddy and Baby Girl.....Can I hear an "Awwwwwwww"?????


This is Aubrey's cousin, Nessa - Junior Babysitter in the making!

I didn't get a picture of mom because she was tired and not quite "properly attired" for prime time, so I'll have to post a pic of her later :-)

Tuesday, April 9, 2013

Divided Fabric Basket (Noodlehead)

I whipped out this divided fabric basket for Baby Cummings (WHO IS BEING BORN TODAY!!!!!) a couple days ago. I used this pattern by Noodlehead: http://www.noodle-head.com/2013/01/divided-basket-pattern.html.

I love this basket! I did do a few things differently (don't we all?). Because I had the Pellon ShirTailor left from the diaper bag posted below, I used that, plus the fusible fleece, for the main basket pieces - I really like the heft and stiffness of that combo. I also interfaced pretty much every other pattern piece. I really wanted this basket to stand up under the rigors of baby-changing :-)

I did have a bit of confusion over the instructions for inserting the divider (probably my fault), so I just did my own thing and it turned out perfect! I used Bungle Jungle by Tim and Beck for Moda Fabrics. Actually, my DIL, Autumn, has a thing for elephants, so I have been "collecting" elephant fabrics for months. I let her choose from  my elephant collection and she picked these. I think they are perfect for Baby Cummings :-)


I used the larger scale print for the pocket, against a multi-dot, and a yellow jelly roll strip for contrast.


The back. I used the plaid for the handles.


She chose the blue-on-white elephants for the interior.

Now all we need is Baby Cummings!

Saturday, April 6, 2013

Pattern Review - Lola Bea Diaper Bag

We (and by "we" I mean son Ben and DIL Autumn, who live with us) are expecting a wee one any day now. They are on track for being induced on Tuesday, April 9 although she's been having contractions for weeks, so we'll see. We just refer to the little one as "Baby Cummings" because we don't know the sex - they wanted it to be a surprise. I really don't care - I'm just excited to have a baby in the house :-)

They have been getting ready, refurbishing a bedroom, carpeting, painting, etc. New drapes, and of course crib, changing table, and dresser. We bought them a rocker & ottoman for Christmas, so we'll all be able rock Baby Cummings. They've got their approved car seat and I ordered a base from Toys R Us, although it's still in the box in the trunk of my car.

They wanted a particular diaper bag and it has all the bells and whistles...BUT it's BLACK! Ben said that way he wouldn't feel intimidated carrying it around. Ok, that makes sense. But...but...but BLACK?

So Grandma decided she needed her own diaper bag! No, Grandma doesn't need diapers (at least not yet!), but Grandma will be packing the kid around eventually, and I couldn't see myself packing him or her into the LQSs around here with a BLACK diaper bag in tow...could you? Nooooooo.....so I decided to make a "pretty" bag and looked around at patterns. I settled on the Lola Bea Diaper Bag Pattern, available for purchase here: http://www.sew-much-ado.com/2012/04/lola-bea-diaper-bag-pattern.html. For some reason, Blogger isn't letting me add a link so you'll have to copy-and-paste into your browser, sorry.


This is a pdf pattern, meaning "instant gratificatication" :-) It's 46 pages (23 pages instructions and 23 pages pattern pieces). You can elect not to print most of the pattern pieces and cut using the measurements, but I went ahead and printed all the pieces. It took me only a few minutes to decide it was well worth printing. It made it so much easier to keep track of the pieces as I worked through the cutting and sewing.

Despite the 23 pages of instructions, this went together very smoothly and quickly. The cutting took me three days, but the sewing took only two. Yes, on the second day, I was still in my jammies at 3:00 in the afternoon, but it was finished!

I made only a couple, small changes to the pattern. I added two tabs with D-rings on either side, to clip my keys and maybe a binky to. And instead of cutting the pocket elastics to the sizes stated, I cut them two inches longer and marked the actual size on the elastic with a pencil - this makes it so much easier when inserting the elastic - the excess hangs out of either end so you don't have to worry about the ends disappearing inside the casing. And I hand-tacked them to the fleece/interfacing which made it easier than ever to press those seams flat! 

Here's my finished bag:

For some weird reason, I've noticed my picture (as well as others I've seen on Flickr and blogs) look rather short and squatty - I assure you, it's much taller than it looks!
 
You can customize the inside elastic pockets to provide either 4 or 5 pockets.
 
Exterior elastic pockets on both sides - I added tabbed D-rings as well.
 
I used Pellon 950F ShirTailor and Pellon TP971F Fusible Thermolam Plus Fusible Fleece. The instructions tell you to cut all the required pieces from exterior fabric, lining, interfacing, and fleece and then cut 1/2" off each side of each piece of the interfacing and fleece. I found it much easier to cut 1" off two sides of all the pieces except for the curved handle and flap. And being a hoarder extraordinaire, I saved those 1" strips for other projects :-) Hint: the more exact you are in trimming the interfacing and fleece pieces, the easier the final construction goes together. (Haha...I typed "contraction" first - I guess baby-birthing is on my mind and I'm glad it's not ME doing the birthing!)
 
The instructions were great, and it really was easier than it looks. Probably the most diffucult part were the last few steps where you are inserting the lining into the exterior bag - mostly because the zippered insert makes things a little wonky. And turning was no picnic, but still easier than I thought.
 
The bag stands up well on its own, and I'm sure it will be even better when it's loaded with all of the supplies that Baby Cummings needs. I would recommend this pattern to anyone, even those with limited experience, because it really does go together fairly easily! 
 

Saturday, February 2, 2013

Odds & Ends...Some "Racy"

Bit and pieces. Flotsam and jetsam. Things and stuff. That's what today's post is - a bunch of unrelated sewn/crafted objects. Oh, and the "Some Racy" is at the bottom, so stop before you get there if you don't like racy (but you'll be missing something hilarious!).
 
First - my son and DIL asked me to wrap a gift for their niece, Nessa, for Christmas. The gift was a LaLaLoopsey Doll (who knew?). It comes in a plastic box that is shaped like a Dr. Suess house!
 
Me:     How am I supposed to wrap this?
Son:    Make a fabric bag...and shape it down like this, and up like that. And make
          the top come off.
Me:     Gee, why didn't I think of that?

 
So here's what I came up with. Seriously...there's a doll in there! The roof velcros on and off. I woulda added a chimney, but I ran out of time - Santa was waiting impatiently on the roof...er...front porch. Word has it, Nessa's eyes lit up when she saw them walk in with her gift.


 * * * * * * * SMILES * * * * * * *

 
Next. I saw these on a blog (http://www.jugglingwithkids.com/2012/01/butterfly-snacks.html) and knew I had to make some! Luckily, I have a friend who has two little girls that I can "use" to make stuff for. I did change them up a little in that I didn't use actual paint. Rather, I colored them with Sharpies (less mess), and drew on the eyes instead of using wiggly eyes. I also glued the chenille-stem antenae to one (in)side of the clothespin. They turned out real cute, and Abby had them pretty much completely mutiliated within 1.34 seconds. Way to go, Abby! High Fives for killing the pretty butterflies! LOL!
Wooden clothespin + Sharpies. Add chenille stem. Clip onto "snack-size" zip bags filled with fruit, crackers, whatever.

 
And here's Ms. Abby, enjoying pulling the wings off the butterflies ;-)


 * * * * * LITTLE GIRLS ARE SO SWEET EVEN WHEN PULLING WINGS OFF BUTTERFLIES * * * * *
 
Next, here's a dog-gone good story...
 
I was at Safeway the other day and when I went through the checkout, one of my buddies was working. She said "Where are your bags?" (my cloth grocery bags). I told her I didn't have my car that day, so I didn't have any bags. Then we started talking about how we do need some plastic bags from time to time for "icky" things, and she mentioned she was getting a puppy in a few weeks (and even whipped out a picture of her soon-to-be new family member). She said she was saving a plastic bag full of plastic bags in the garage to have for walking the new pup. I said "Mebbe you need a cute quilted, puppy-themed fabric plastic bag holder!" She laughed and said "Oh, and I suppose you have some fabric with puppy feet on it?" I said yep I do and I guess I'll have to make you one!
 
So here's what I came up with, and I dropped it off for her at the store yesterday, although she wasn't working at the time, but another of my buddies said they would put it in her cubby in the employees' area. I think it's quite cute!
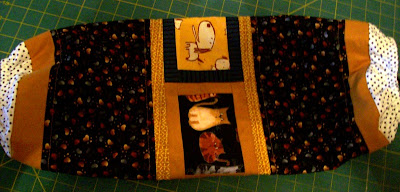
 
I put some fussy-cut pups, and one panel with some worried-looking kitties, too. Heehee.


* * * * * WOOF WOOF MEOW * * * * * 
 
Now...here's the "Racy" part...YEP I KNEW YOU'D WANNA SEE THIS!!!!!
 
My son's girlfriend asked me to make a sexy or funny t-shirt for my son's birthday bash at the local tavern just before Christmas. Adam likes to Karaoke occasionally, so I thought I would work with that theme. I found a funny saying and adapted it a bit, then grabbed some images. I worked it all up in Snag-It and Word and printed it on fabric photo sheets, then sewed it onto a purchased t-shirt.

 
This went on the back of the t-shirt.


And this went on the front of the shirt...see the arrow pointing downward? Well, then I made a felt microphone. And believe it or not...it was the SECOND such felt microphone I've made! I made the other one for a Mama Mia! themed apron swap and included a saucy apron and feather boa :-) So I already had a pattern in my head...but this time, I made a paper pattern and saved it...just in case I ever have to make another one for some weird reason (ya never know!).
I used velcro to attach it to the...er...bottom of the t-shirt...um...product placement is EVERYTHING, let  me just say...


Down at the tavern (Buzz Tavern - yes, that's really the name!) Adam tried to get out of wearing the shirt at first. But when we finally got him to put it on...well, let's just say...he really got into it and wouldn't take it off! And here are the pictures to prove it!


Adam with friend, Laura. Note that Laura is singing using the felt microphone!


Now Adam seems to be using both microphones...


Now he's just using the felt one, and judging by the look on his face, Adam seems to be enjoying his birthday VERY much :-)


 Adam and his girlfriend, Lisa.
 
 * * * * * PRICELESS * * * * *

Oh, and if you should happen to run across a YouTube video of some drunken grandma boogying the night away at a local tavern...well, that's NOT me! Really...it's not...


Sunday, January 6, 2013

Stacked Hearts Tutorial

Back in the 80s, I created this technique for stacked shapes to use for a "package tie-on" for a gift wrap. Then I just completely forgot about it...until Christmas 2012...when I dragged this old idea out and then wondered why I'd left it, stuck in the 80s, for so long. I used these to decorate several gifts and then thought "I should make a tutorial!" I used this technique for quite a few of my gift-wrappings this year - I made "primitive" asymmetrical stars.

But since we are past Christmas, I decided to change it up a bit for a Valentines Day approach. I love these package tie-ons because they add a lot of dimension and movement!
They add a beautiful 3-D appearance to any package!

This is an easy, no-sew project that takes just a few, easily-obtainable supplies. If you're crafty, you probably already have many or all of these already! Here's what you will need:

  • 3 coordinating fabrics - fat quarters work great
  • Fusible web - Pellon or Heat n' Bond, for example
  • 2 or 3 sheets of cardstock in coordinating or neutral colors (8 1/2 x 11 or 12 x 12)
  • 4 large-ish beads, at least one should coordinate with your fabric
  • Pearl cotton or 3 strands embroidery thread to coordinate with your fabric
  • Doll needle or needle large enough to accommodate your thread AND pass through your beads
  • Narrow ribbon
  • Pencil
  • Iron
  • Scissors

Let's begin! Again, because it's close to Valentines Day, I'm using hearts for my shape. But for other occasions, any shape could be used - mostly I've used stars. Circles? Squares? Hexagons? Cars? Dinosaurs? You're only limited by your imagination!

The size of the shapes will be determined by the size of the gift you want to decorate. Because I have a "large" (ahem) supply of 8 1/2 x 11 cardstock, I try to stick to that size for the largest shape. But if you have 12 x 12 cardstock, you could increase the size. If you want to decorate a REALLY big package, you could use posterboard or use small strips of fusible web to connect sheets of cardstock to whatever size you want. I've done this, and it works really well.

Today, I'm going to stick to 8 1/2 x 11, and to help me work within those parameters, I'm going to mark my fusible web to those dimensions. Not necessary, but helps to prevent over-drawing your largest shape.

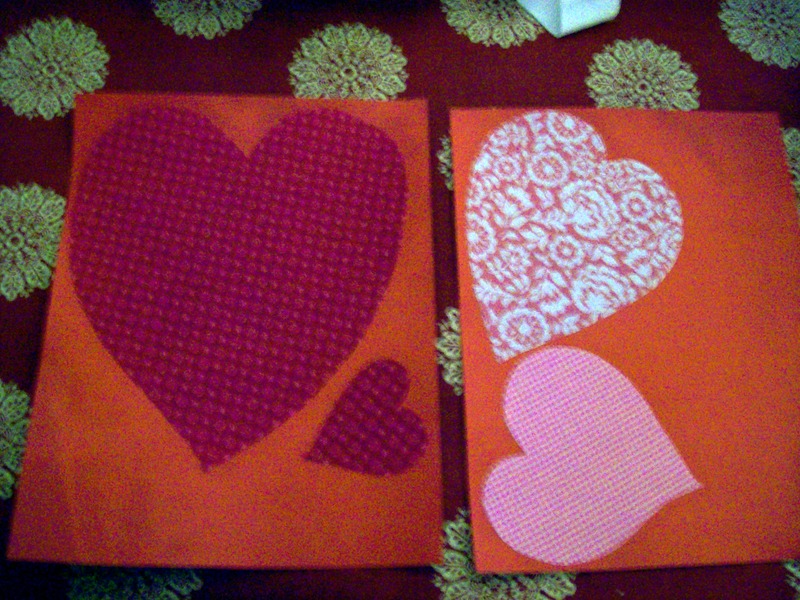
Use a pencil to quickly hand-draw - don't over-think it...you can always smooth out your lines before you fuse and trim! Or, you could use a template, snag a shape from the Internet, or use Shapes in your word-processing program, etc. When you're happy with your drawing, smooth/straighten your lines, if necessary. Draw a smaller identical shape, and another smaller than that. And, just because, I added a fourth heart to fuse directly to the smallest heart for contrast. Here, I've contained my desired three smaller shapes within a second 8 1/2 x 11 area.

Cut the shapes out of the fusible web, leaving 1/2 inch-ish border.

Fuse the webbing to the back of your fabrics. Cut out the shape on the drawn lines. Before you cut, you may wish to peel back one small corner/area in order to make removing the paper backing easier.
Notice my pretty NEW ironing blanket I made! My old one was in complete tatters!

Iron the fused fabric to the cardstock, and trim the cardstock even with the fabric edges.
Tip! At this time, you may wish to save your "templates" so you can easily recreate (trace) them without redrawing!

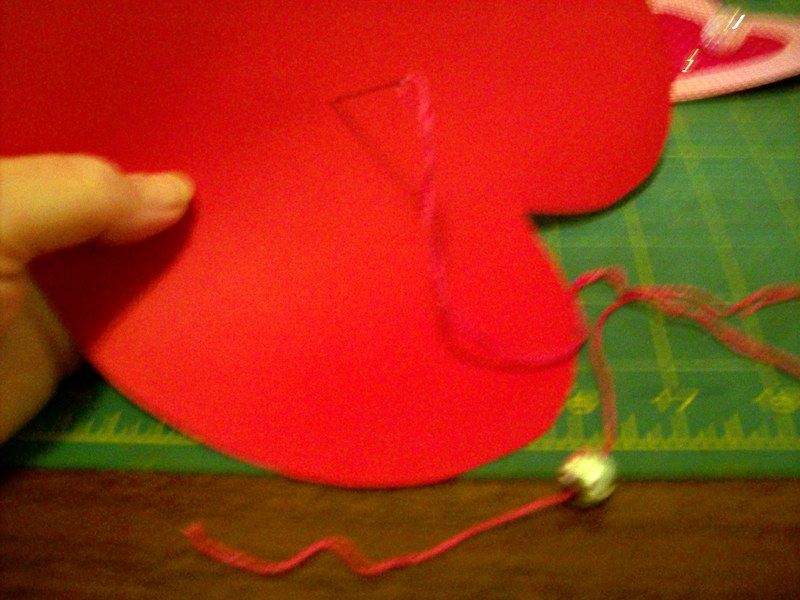
To make the stack, thread the doll needle with your pearl cotton or 3 strands embroidery thread. Pass the needle through your bottom bead (leave a 3" tail), then through your largest heart, from back to front. 

Add your next bead, and thread through the back of your middle heart, add third bead, and thread through the back of your smallest heart. 

Add the fourth bead, then drill back down through the stack EXCEPT for the bottom bead, leaving a 3" tail. I drill down about 1/4" away from the first holes; farther apart if you need to keep the shapes more closely aligned, like these hearts, so they don't swing completely around. Note: I did add a small E bead to the top of my uppermost bead because it was quite large; if your bead is smaller, you can just go directly around the bead and down through your top shape. Carefully but firmly pull your threads to eliminate any slack, then tie the thread ends in a double knot around the bottom bead.

To attach your stack to your package, cut a 14" length of narrow ribbon. Tie the ribbon around the bottom bead, between the bead and the bottom heart (tie a loose knot in the ribbon, then slip it over the bead). Use this ribbon to tie the stack onto the ribbon on your package. Leave the ends sticking out, or cut them off, as desired.

Tie the stack onto your package ribbon, criss-crossing and cinching the ribbon. 

Grab your package and shake it a bit! Admire how the hearts wiggle!

Now go forth and make stacked shapes using YOUR imagination!