


- 3 - 10 1/2" x 5" fabric - one quilters cotton for outer fabric, one coordinating quilters cotton for lining, and one cotton flannel (you can also use cotton batting, but I prefer the thinner flannel for this project)
- 1 - 2" piece of 3/4" sew-in hook-and-loop fastener (Velcro)
- 1 - 1 3/4" x 10 1/2" strip for ruffle
- 1 - piece of decorative twill tape about 5 1/2" long - or you could use a 1 3/4" x 5 1/2" strip of coordinating fabric
- 3 - 3" squares for prairie points
I add different decorative details depending on my mood, including beads, charms, small pieced bits, etc. Use your imagination! Just be careful about placement.
Begin by making your prairie points, if desired. Fold and press as shown below - I folded mine point-to-point, but you can fold them edge-to-edge as well. Arrange them however you like, making sure the total length doesn't exceed a scant 4 1/2", and baste across the bottom using a scant 1/4" seam. Set aside.


Create the ruffle, if using: Make a narrow hem on one long side. Stitch two rows of basting stitches on the opposite long side.

Gather the ruffle strip, leaving about 1/2" on each end ungathered (this makes it easier to layer your decorative elements). Using a marking pencil, make a line about 4" from one short end of your outer 10 1/2" x 5" fabric piece.

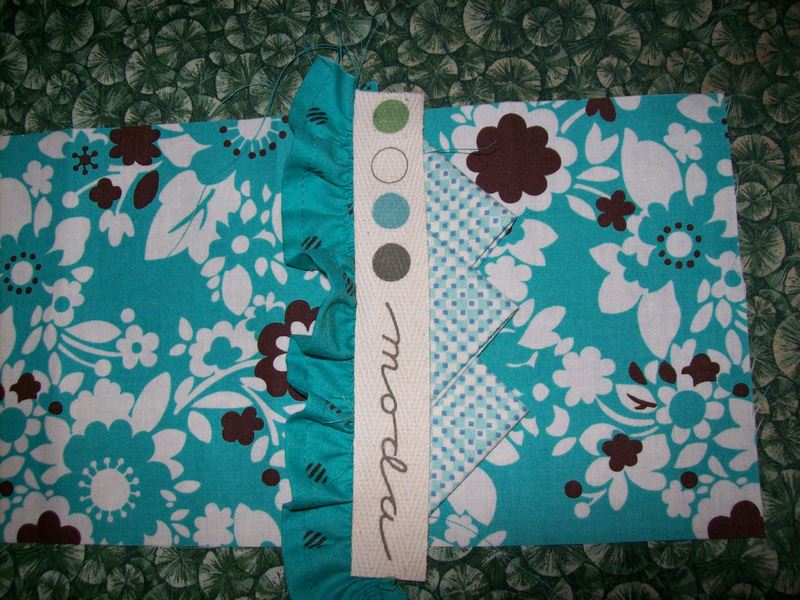
Layer the decorative elements: Align the raw edge of ruffle to the left, along the marked line (let the ungathered ends spill off the fabric edge). Pin or baste in place.

Butt the raw edge of the prairie points up the the edge of the ruffle. Pin or baste in place.

Center the twill tape over the ruffle/prairie points. Stitch along both long edges, through all layers.
(If you are using a fabric band instead of the tape, fold the band WST, matching long edges; press. Lay the band along the ruffle, matching raw edges. Stitch. Fold the band to the right, covering all raw edges. Stitch along the folded edge. You could also use a fabric tube for this, jumbo ric-rac, etc.)
Layer your outer fabric and lining fabric, RST. Layer the flannel on the bottom. Make sure all edges are even.

Pin all the way around.

Stitch, using a 1/4" seam allowance. Leave a 2" opening on one long side, avoiding the decorative elements. I left my opening where the lavendar pin is in the picture below.

Trim off any decorative element edges, and then clip the corners. Cut across the corners, close to the stitching, then again at an angle, as shown in the picture below - this helps to avoid bulk when turning right side out.

Turn right side out through the opening. Push the corners out using a Bamboo Point Turner/Creaser or your favorite tool. If I had my way, every sewist would have one of these! Press well.

To create the pockets, flip the fabric sandwich over and fold the short ends in towards the inside center, leaving about a 1/2" gap; press.

Pin the Velcro in place, about 1/4" from each folded edge (be careful not to catch the back inside of the pocket). Open the wallet out flat, and stitch around each piece of Velcro. Fold the wallet back together and stitch along each long side, very close to the edge.

That's it! You're done!

Load 'er up, and go shopping!

As I said earlier, get creative and add your own favorite features. Here's the one I'm currently using in my purse - I added a fabric band, a charm and some beads.

2 comments:
Great Tutorial .. thanks for taking the time to make if for us :) Your a dear~
M
So could a beginner make this?
Post a Comment